


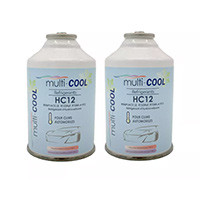


Recharge your air conditioning with the Duracool 12a
Recharge your air conditioning with the Duracool 12a
Duracool 12a is a cooling gas used to replace R12 and R134a gases. This gas is known and appreciated for its ecological qualities since it does not produce greenhouse gases, is hydrocarbon and its impact on the ozone layer is zero. The gas Duracool 12A is used to extend the life of air conditioning systems, since unlike the gases traditionally used, it is not caustic, but how to recharge your air conditioning with the Duracool 12a ?
Compatibility
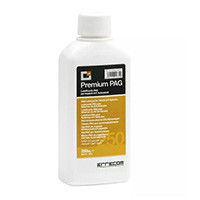
The Duracool 12a is 100% compatible with lubricants used in the R12 and R134a systems. Thus, you will not need to modify the lubricating oil already present to use another substance. It is also perfectly suited to metal components, compressor engine materials, as well as all components of your air conditioning system.
The HC-12a allows for more efficient cooling than an R-12 system upgraded to R-134a, with much higher fuel efficiency as well. Unlike R-134a, HC-12a is fully compatible with the pipes and oils used in R-12 systems, making conversion much easier to achieve.
How to recharge your air conditioning with a can Duracool 12a ?
To use the Duracool 12a to charge your air conditioning, start by carefully reading the instructions on your Duracool can. As this gas is highly flammable, it must be handled with care. Note that this refill procedure is only valid for cans Duracool.
Start by preparing the material:
- Make sure, before setting up the faucet on the can, that it is turned entirely counterclockwise. This will allow you to prevent premature drilling of the can.
- Then securely screw the faucet onto the can.
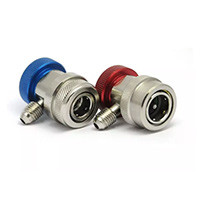
- Then install the R134a or R12 quick plug connector (depending on your equipment)
Then start your car to start filling:
- Start the engine and set the air conditioning to the lowest temperature
- Locate the low pressure socket of the air conditioning at the level of your car, it is most often a blue or black room. Note that to make the difference between the high pressure and low pressure socket you just have to observe the size of the cap: the one corresponding to the low pressure is the smallest. Be careful not to make the connection to the high-pressure side.
- Unscrew the low-pressure cap, then plug in the hose connector by pulling on the ring, holding it back and pushing the connector on the socket. Then check that the ring is back in its starting position. If this is the case, your connection is done correctly.
- Then manually rotate the valve valve until it pierces the can. The movement must be made clockwise.
- Then perform the reverse movement so that the cooling gas arrives at the air conditioning system.
- Keep in mind, while you are filling, to hold the gas can "upside down"
- The filling is usually completed when you observe steps and stops more or less 60 seconds apart.
- It is still possible for you to lower the temperature of the car further if it still seems too high. Add small amounts of Duracool gradually by pre-opening and slightly closing the faucet several times, to reinject product in small quantities.
- Be careful not to insert too much product to avoid overloading the system. Let the air conditioning run for some time before gradually adding gas Duracool. Monitor the pressure gauge and prevent the needle from passing beyond the orange zone of it
- Once the air conditioning charging process is complete, turn the valve from the faucet clockwise again to close it completely.
- Then pull the ring again to unclip it, this will allow the connector to come out automatically. Make sure that the ring is positioned back in its original place.
- If you have not completely emptied the can, do not remove the faucet from it. Be sure to keep the container away from a flame and preferably store it in an airy area or outdoors.
Read the kit carefully
Complete instructions are included with the universal charging kit Duracool, these instructions must be read and followed before any intervention on a vehicle. This quick start guide has been provided to help explain the steps involved in installing refrigerant Duracool 12a.
To conclude
If a leak is detected, be sure to have it repaired before loading it with gas. The Duracool 12a is highly flammable and should only be tested with an electronic hydrocarbon leak tester, soap bubbles or fluorescent tracer liquid. If leaks are detected, ventilate the area, keep it away from the flames and repair the leak.
Share this content