


Pool Winterizing & Watering: The Guide to Frost Protection
- The devastating impact of frost on hydraulic systems
- Passive winterizing vs. active winterizing: which method to choose?
- Detailed filtration draining procedure
- Securing the pool: plugs, Gizzmos and floats
- Automatic watering: air purging
- The critical case of ball valves
- Final checklist and best practices Multitanks
- Generate your Personalized Winterization Checklist
- Your priority actions :
The devastating impact of frost on hydraulic systems
To understand the importance of a harsh winter, we first need to look at the physics of water. Unlike most liquids, water has a "dilatometric anomaly". When it falls below 4°C, its density decreases and its volume increases. At the moment of transition to the solid state (0°C), this expansion reaches around 9%. In a rigid PVC or polyethylene pipe network, this expansion force is irresistible. It generates an internal pressure capable of exceeding 200 bar, far higher than the nominal resistance of any standard fitting or pump body (generally tested between 6 and 16 bar).
The risk is not limited to a simple tube crack. Frost attacks weak points first and foremost: valve threads, union seals and, above all, internal pump components (impellers, diffusers). A micro-crack in a pump casing can render the unit totally unusable by air intake as soon as it is restarted. This is why frost protection should not be seen as a simple autumn chore, but as a genuine preventive maintenance operation designed to safeguard an investment that often runs into thousands of euros.
Passive winterizing vs. active winterizing: which method to choose?
The choice between active and passive winterizing depends essentially on your geographical location and availability. Active winterization involves leaving the pool in reduced operation. The pump runs for a few hours a day, ideally during cold spells (between 3 and 7 a.m.), as moving water is much harder to freeze. However, this method is risky: in the event of a prolonged power cut during a snowstorm, circulation stops and freezing can destroy your system in just a few hours.
Passive winterization, or "total frost protection", is the safest method and the one most recommended by experts Multitanks for second homes or areas with harsh winters. It involves completely shutting down the filtration system, lowering the water level and, above all, draining all the pipes. This is where the quality of your initial installation (presence of union fittings and drain valves) becomes decisive. A well-designed installation means you can switch from one mode to the other in less than an hour, without the need for complex tools.
Detailed filtration draining procedure
The first step to successful winterization begins in the equipment room. Before doing anything, switch off the main power supply to prevent the pump from running dry. Start by draining the sand filter. Each filter has a drain plug at its base. Caution: the water will drain slowly, as the sand retains moisture. Leave the plug open (or remove it completely by storing it in the pump basket) to allow residual condensation to drain away continuously.
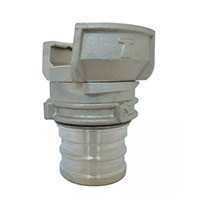
Next, the pump. This is the most fragile part. Unscrew the drain plug(s) at the bottom of the prefilter. A professional tip is to use 3-piece unions to completely disconnect the pump from the rigid piping. By physically removing the pump from the equipment room and storing it in a cool, dry place, you protect not only the pump casing from freezing, but also the motor winding from oxidation due to winter humidity. If the pump remains in place, lubricate the seals with silicone grease (never petroleum-based grease) to prevent them from drying out.
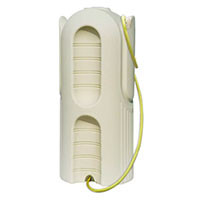
Securing the pool: plugs, Gizzmos and floats
Once the equipment room has been drained, it's time to take care of the pond. Lower the water level to around 10 cm below the discharge nozzles. This empties any stagnant water in the horizontal underground pipes. To ensure that no rainwater comes back to fill these circuits, you need to plug each orifice (discharge and brush intake) with conical rubber winterizing plugs. Tighten them until the seal expands perfectly against the wall of the fitting.
The skimmer is a special case. Its plastic structure is extremely sensitive to the thrust of ice. The use of a Gizzmo is indispensable here. This long, flexible plastic threaded tube is screwed into the suction port at the bottom of the skimmer. Should the water in the skimmer tank freeze, the Gizzmo will compress, absorbing the pressure instead of the plastic walls. Finally, place a line of winter floats diagonally across the surface of the pool. These floats, partially weighted, compress under the pressure of surface ice, preventing it from exerting destructive lateral pressure on your coping or liner.
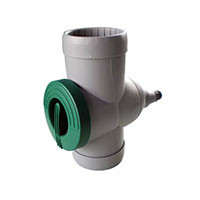
Automatic watering: air purging
Sprinkler systems are often overlooked, even though they are the first to be damaged by the cold because they are shallow. To purge a sprinkler system, gravity is not enough. Water remains trapped in the elbows and bodies of retractable sprinklers. The solution is to use compressed air. Install a purge connection (valve or tee with threaded plug) at the outlet of your programmer or on your main manifold.
Connect a compressor and send air zone by zone. The air will push the water towards the nozzles and turbines, which will rise and discharge the water as mist. Caution: never exceed 3 bars of pressure, as compressed air heats up through friction and can deform internal plastic components if the pressure is too high or the duration too long. As soon as only air is coming out of the sprinklers, move on to the next zone. This operation ensures that your solenoid valves won't be cracked by frost, a classic and costly failure in spring.
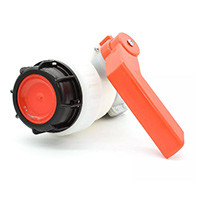
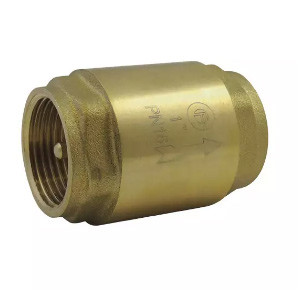
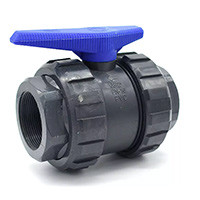
The critical case of ball valves
This is one of the most technical aspects of winterizing. A ball valve has a cavity around the inner ball. When the valve is in the closed position, a small amount of water is trapped in this cavity. If this water freezes, it has no escape and will burst the valve body, even if the rest of the pipe is empty.
The golden rule for all your valves (pool or sprinkler) during winter is to leave them in the "semi-open" position, i.e. at a 45-degree angle. In this position, trapped water can communicate with the rest of the piping and drain or expand freely without causing damage. This is an often overlooked detail, which explains why many valves leak at the axis as soon as the water is restored.
Final checklist and best practices Multitanks
In conclusion, good winterization is all about anticipation. Don't work in a hurry on the first night of freezing temperatures. Take the time to dismantle sensitive equipment such as pH or ORP probes, which should be stored in a special preservation liquid and protected from frost. Drain your heat pumps by unscrewing the inlet and outlet unions, then tilt the unit slightly to empty the heat exchanger.
By following these detailed protocols and using the right equipment (plugs, silicone grease, union fittings), you can turn a seasonal threat into a simple maintenance routine. You'll preserve the lifespan of your equipment and ensure a stress-free restart, free from leaks and unnecessary repair costs, as soon as the warm weather returns. Our expertise at Multitanks means above all providing you with the keys to a long-lasting, self-sufficient installation.
Generate your Personalized Winterization Checklist
Check off your equipment to obtain your purging and safety instructions.
Share this content